Proper Account Setting For Gmail Mac
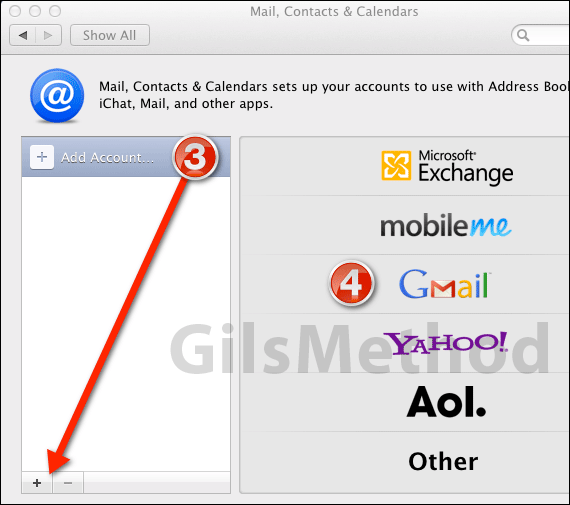
First, you need to begin setting up a new mail account, either through the Settings app, or directly within the Mail app if you haven’t set up an email account already. Instead of selecting the Gmail option, however, you want to select Microsoft Exchange.
Set Up Your Gmail Account to Use IMAP. To setup your Gmail account to use IMAP, sign in to your Gmail account and go to Mail. Click the Settings button in the upper, right corner of the window and select Settings from the drop-down menu.
Now, in the ‘Email’ field, enter your full Gmail email address. Leave the ‘Domain’ field blank.
Next to ‘Username’, you need to enter your email address again, including the “@gmail.com” portion. And next to ‘Password’, you need to put your password. In the ‘Description’ field, you can label your new account whatever you wish. Now tap the ‘Next’ button in the top right-hand corner. If you get an “Unable To Verify Certificate” error, simply hit the cancel button and ignore it — it won’t stop you from connecting to your account. 
A new field will pop up labeled ‘Server’. In this box, type “m.google.com” and then hit the ‘Next’ button again. You can now choose to enable or disable mail, contacts, and calendar syncing with your Gmail account. I’m guessing you’ll want to keep the mail one on, otherwise you wouldn’t be reading this tip, but you can disable the other two if you do not use them. Once you’re happy, simply hit the ‘Save’ button and your new account will be created.
You can now access your Gmail account using the Mail app, and new mail you receive will automatically be pushed to your device. The first time you open Mail and it syncs with the server may be a little slow, because it’ll need to download all your emails, but everything should be pretty snappy after that. If, after using your Gmail account for a day or so, you find new emails aren’t being pushed to your device, you may have push services disabled. To enable this, open up the Settings app on your iPhone and then tap the ‘Mail, Contacts, Calendars’ tab. Beneath your mail accounts, you’ll find the ‘Fetch New Data’ options.

Tap on this and ensure the ‘Push’ toggle is turned on.
Change Outgoing server settings in Mail on Mac You can change preferences for the you use to send messages, as directed by the provider of your. To change these preferences in the Mail app on your Mac, choose Mail > Preferences, click Accounts, click Server Settings, click the outgoing Account pop-up menu, then choose Edit SMTP Server List. Server list The servers available to you and the accounts that are using them. Add, Remove Add or remove a server.
Don’t remove a server that’s in use by an account unless you’re ready to select or add another one immediately. Server Settings Description The description of the server appears in the Mail sidebar and any pop-up menu where you choose a server.  User Name Your user name on the mail server. Password Your password on the mail server. Host Name The name of the mail server. Automatically manage connection settings Mail automatically manages settings for your email account in Mail, such as port numbers and authentication methods. If you deselect this option, you can specify the following, as directed by your email account provider: • Port (or Internal Port and External Port), Use TLS/SSL: The port numbers for sending messages, and whether to use TLS/SSL.